1. My Preferred Workflow: Client-Server Separation
Trying to run a heavy development environment, multiple virtual machines, and a dozen browser tabs on a single laptop is a quick way to cause thermal throttling and constant fan noise. I prefer a different approach: a strict Client-Server Separation. I use a lightweight laptop as my main interface, while a dedicated, powerful server handles all the heavy lifting in the background.
It also brings several real engineering benefits:
1.1. Target Environment Parity and Security
- Real-World Context: By working directly on the server, I solve problems in the actual environment where the code will run. This stops the classic “it works on my machine” problem, which is usually caused by local desktop quirks or OS workarounds.
- Containing the Blast Radius: Running risky experiments, untrusted code, or new binaries on a dedicated VM keeps my primary laptop safe. My private credentials and personal data are completely isolated from my testing environment.
- Keeping Security High: I don’t have to turn off my laptop’s firewall or install questionable tools just to make a single project work. The client stays locked down and secure.
- State Management: Virtual machines give me easy snapshots and granular 802.1Q network segmentation. This creates a perfect safety net for rapid testing and quick rollbacks if something breaks.
1.2. Saving Resources and Battery Life
Moving the hard work to a server keeps the client machine running smoothly. This gives me some immediate daily benefits:
- A Responsive System: The laptop stays fast and snappy because it isn’t fighting for CPU cycles or RAM against a local hypervisor.
- Quiet and Long-Lasting: Because the laptop isn’t working hard, the fans stay off, and the battery lasts significantly longer.
- Hardware Longevity: Even an older or cheaper laptop works perfectly fine for years when the real “brain” of the operation lives on the server rack.
1.3. The Problem with Laptop Scalability
From a hardware perspective, modern laptops are basically disposable. They have severe limitations when you need more power:
- Vertical Scalability: Most modern laptops have soldered CPUs, RAM, and even storage drives. Upgrading them is often impossible or just too expensive.
- Horizontal Scalability: You realistically can’t connect multiple laptops in a cluster to handle larger, more complex workloads.
- Cost Efficiency: Laptop parts charge a massive premium for portability. When you look at the price per core or per gigabyte of RAM, server or desktop hardware is a much better deal.
The Goal: I built my homelab around this idea: a powerful, on-demand virtualization server dedicated to testing and compute-heavy tasks. This machine only runs when I need it. Because it isn’t running 24/7, I can focus entirely on raw performance rather than worrying about idle power consumption.
2. The Hardware Bottleneck: Outgrowing the i9-9900K
In the winter of 2024/2025—well before the sudden surge in RAM prices—my primary virtualization machine was based on an ex-gaming build. It featured an Intel Core i9-9900K, a Z390 motherboard, and 16 GB (2×8 GB) of DDR4 memory.
While 16 GB was perfectly adequate for basic virtualization, any attempt to run more demanding workloads—such as multiple VMs, containerized stacks, or small Kubernetes clusters—turned memory management into a constant chore. I aimed for a minimum of 64 GB to gain some operational breathing room. However, consumer-grade DDR4 DIMMs at that capacity were both rare and expensive. In contrast, server-grade LRDIMMs offered vastly superior value (roughly 300 PLN per 64 GB module at the time) alongside the added stability of ECC for virtualized environments.
I decided to sell the 9900K, motherboard, cooler, and RAM. This gave me ~2000 PLN, which became the budget for the project.
3. Defining Upgrade Goals and Platform Choice
My priorities for the new build were:
- Match or exceed the 9900K’s CPU performance (approx. 18,000 PassMark multi-thread score).
- High GB/PLN ratio for RAM, aiming for at least 64 GB.
- Sufficient headroom for future upgrades.
- At least one available PCIe slot to add a GPU for future AI workloads.
(Note: While PassMark isn’t a perfect metric for virtualized workloads—where higher core counts frequently outperform faster clocks due to reduced context switching—it provided the most accessible baseline for comparison.)
Platforms supporting affordable ECC DDR4 LRDIMMs generally came down to three options:
- LGA 4189 (Newer Xeon Scalable): Faster and more modern, but the hardware still holds a premium price.
- LGA 2011-v3 (Xeon E5): While the platform is cheap, the top-tier CPUs required to match the 9900K were actually more expensive than the 9900K itself.
- LGA 3647 (1st/2nd Gen Xeon Scalable): The undisputed sweet spot for value.
The standout choice was the Intel Xeon Gold 6148 (20 cores / 40 threads, 2.4 GHz base, up to ~3.7 GHz turbo, 205 W TDP). It scored an impressive ~29,037 in PassMark—a solid step up from the 9900K—and cost an unbelievable 36 PLN. The additional cores allow for much higher VM and container density in Proxmox, while the quad-channel memory controller and abundant PCIe lanes offer excellent expansion potential.
4. Component Selection: Memory and Motherboard
4.1. The Memory Bank
I selected two Samsung M386A8K40BM1-CRC4Q modules: 64 GB DDR4-2400 LRDIMM, quad-rank (4Rx4), ECC. At ~300 PLN each, populating two slots gave me 128 GB in total. This provides massive headroom for serious experimentation, with ECC ensuring extra reliability.
4.2. The Motherboard Hunt
Finding a suitable LGA 3647 motherboard was arguably the biggest challenge of the project. The second-hand market is flooded with cheap boards from branded servers (HP, Dell, etc.), which usually involve:
- Custom, proprietary form factors.
- Exotic power connectors and vendor-specific PCIe risers.
- Restrictive whitelists for CPUs, RAM, or PCIe cards.
- Firmware that locks into “protected modes” if specific vendor fans are missing.
While I don’t mind tinkering, these proprietary hurdles add hidden costs and limit flexibility. The better alternatives are standard workstation boards (like the ASUS WS series), but they are rare and remain highly expensive (2000–3000 PLN).
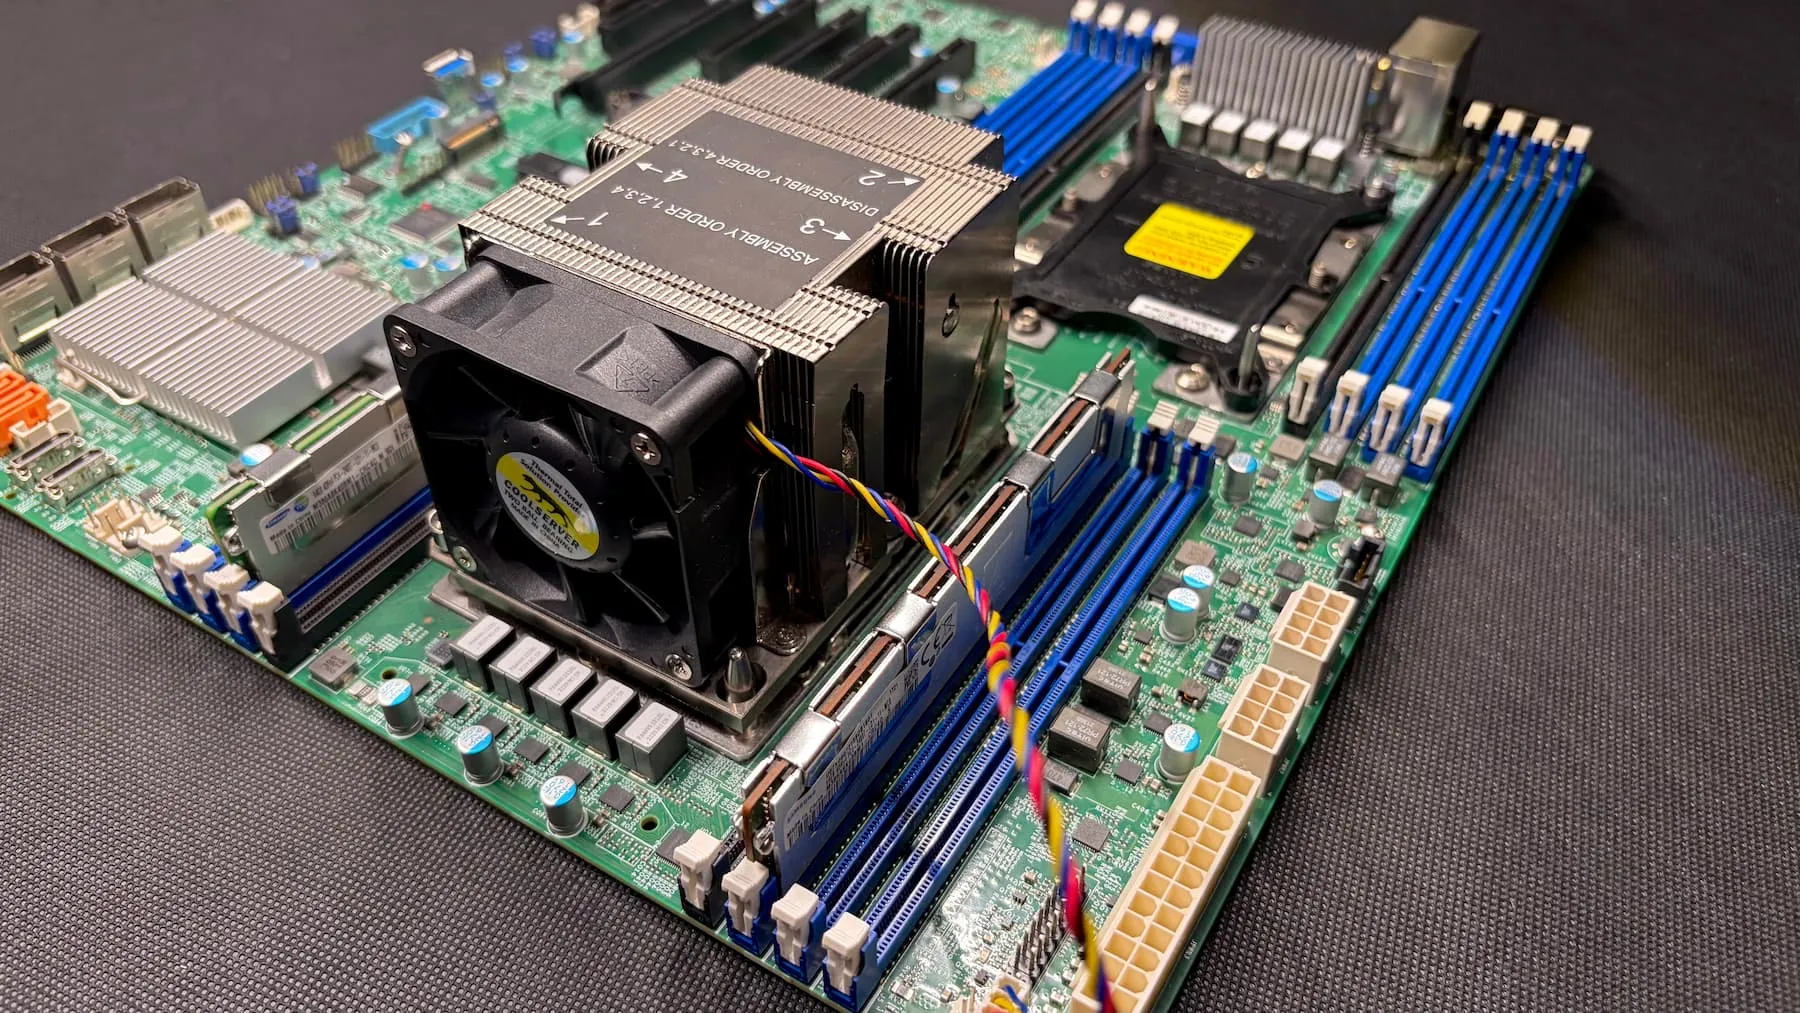
After months of searching, I finally scored a Supermicro X11DPI-N for 500 PLN. It was the perfect fit for my use case—reliable, expandable, and free of vendor lock-in:
- Standard E-ATX form factor (12” × 13”).
- Dual-socket LGA 3647.
- 16 DIMM slots (supporting ECC RDIMM/LRDIMM).
- 4× PCIe 3.0 x16 + 2× x8 slots.
- Onboard M.2 (PCIe 3.0 x4, M-key) and 14× SATA ports with RAID support.
- Integrated IPMI for remote management.
5. Mechanical Integration: Cooling and Chassis
5.1. The Cooling Challenge
On the LGA 3647 platform, the cooler doubles as the CPU mounting bracket. Uneven or incorrect pressure can cause system instability or permanent socket damage, meaning poor-quality DIY solutions are highly risky.
Realistic options were limited:
- Low-profile rack coolers (U1/U2): Effective but rely on high-speed, deafening fans.
- Aftermarket air coolers: Almost non-existent. The Noctua NH-U12S DX-3647 is excellent but costs over 500 PLN new, and used units are scarce.
- Water blocks: Available for around 300 PLN, but they add maintenance complexity and require additional loop components.
I compromised by purchasing the largest affordable air cooler I could find on AliExpress (~120 PLN). It is a U2-height tower with a 60 mm fan. While it is noisy (spinning up to 7,700 RPM) it ensures stable 65–70 °C under all-core stress-ng testing.
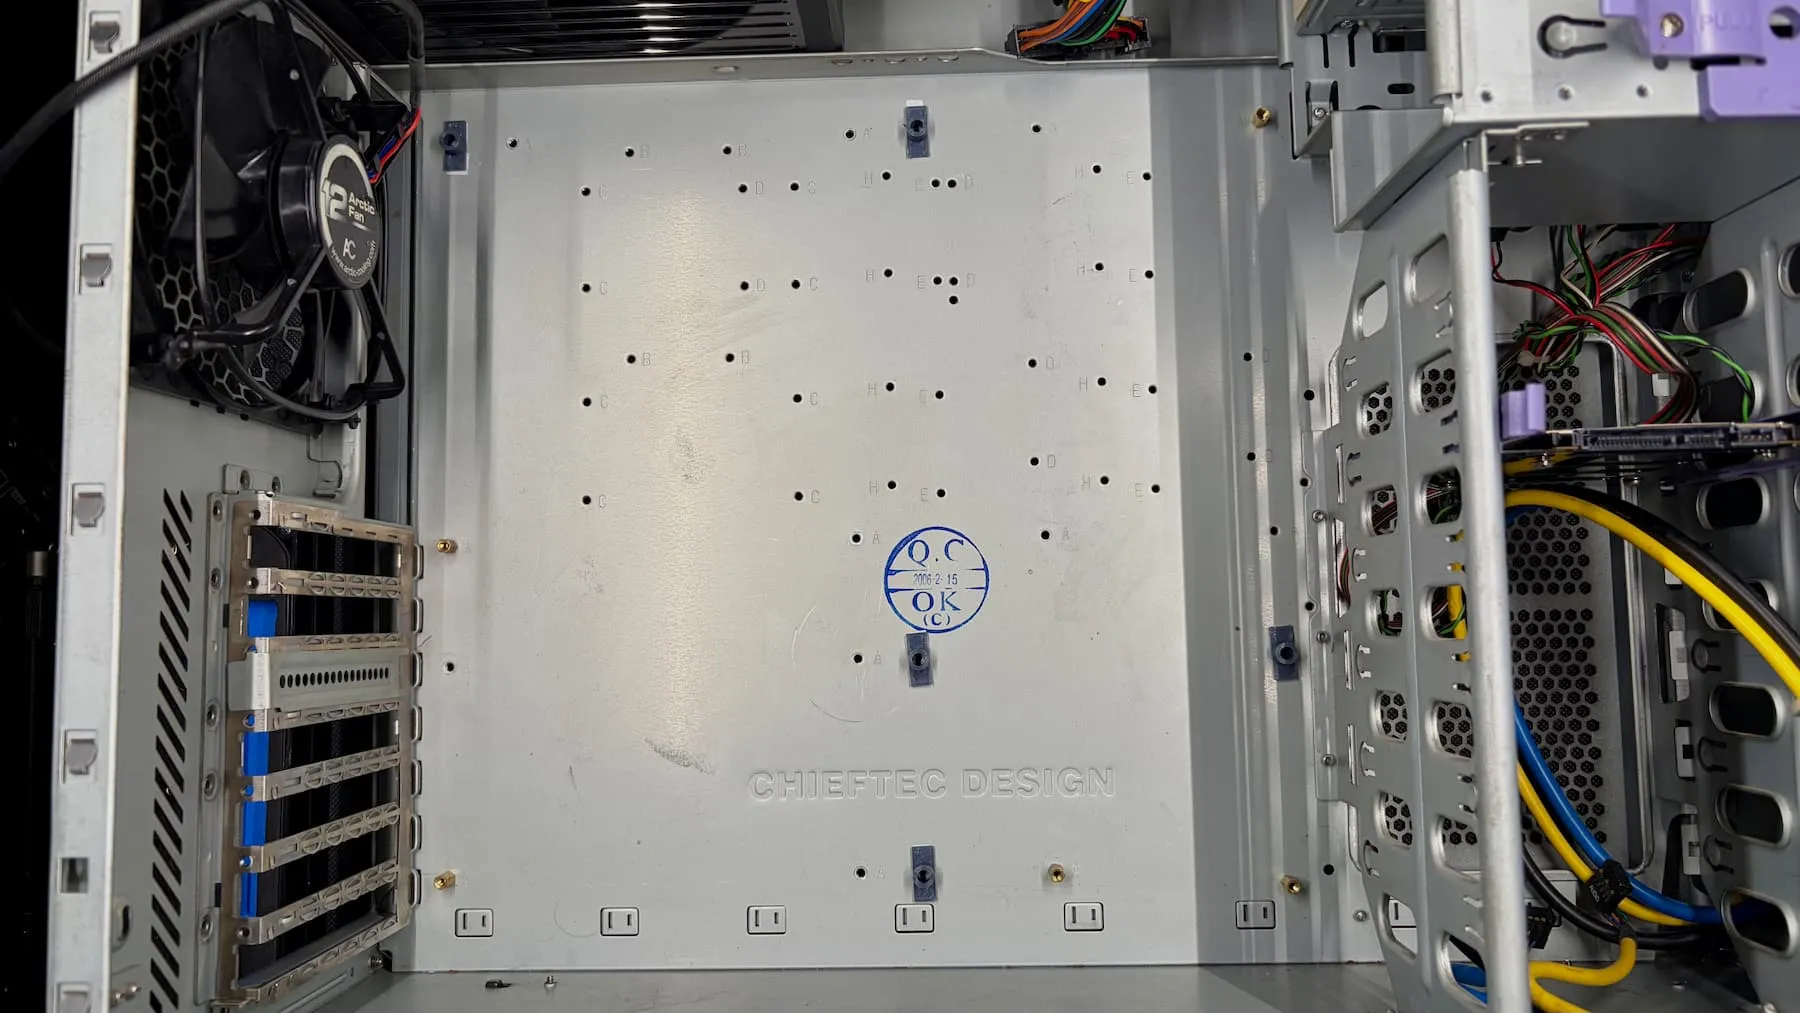
5.2. Sourcing the Chassis
Finding a modern E-ATX case can be tricky, but the Polish second-hand market provides a great solution if you know what to look for. Vintage Chieftec mid/full-tower cases are ideal. Built from thick steel, they are incredibly durable, easily fit E-ATX boards, and frequently sell for ~45–50 PLN.
Other Components:
- PSU: Reused my reliable be quiet! Dark Power Pro 650 W.
- Storage Interface: A PCIe x16 to 4× NVMe adapter to utilize my existing M.2 drives.
- Cabling: A Mini-SAS SFF-8087 to 4× SATA cable (~20 PLN) for one of the board’s three Mini-SAS ports.
- Video: A basic VGA to HDMI adapter (~20 PLN) for the initial setup.
6. Assembly: Bent Pins and a Faulty M.2
The motherboard was listed as “new,” but visual inspection revealed it had clearly been mounted before. The socket had a few slightly bent pins, which I carefully straightened under a microscope. (Tip: Always inspect used LGA 3647 sockets closely; the massive pin array and lack of a protective cover make them highly prone to damage).
Bench testing went smoothly: the board posted, booted GRML Linux from a USB, and passed stress tests. Most I/O worked flawlessly—except for the onboard M.2 port. The NVMe drive received power (it heated up normally), but it remained completely invisible in the BIOS. I tried everything: adjusting relevant BIOS settings, testing different drives (including those on Supermicro’s official compatibility list), cleaning the connector with isopropanol, and inspecting for physical damage. Nothing worked. Because the port routes through the chipset (and all other chipset I/O functioned normally), the issue is likely a subtle configuration quirk or a trace wiring fault. Fortunately, this wasn’t a showstopper since I had the 4× NVMe PCIe adapter and OCuLink ports available.
Other notable assembly quirks:
- PCIe Topology: The top three PCIe slots route directly to the second CPU socket, which is currently empty, rendering those slots inactive.
- BMC Fan Logic: The Baseboard Management Controller (BMC) fan modes are essentially binary: “idle” (which is already quite loud) and “turbo” (very loud). Furthermore, swapping a fan header while the system was live triggered a “dead fan” alert that required a hard BMC reset to clear.
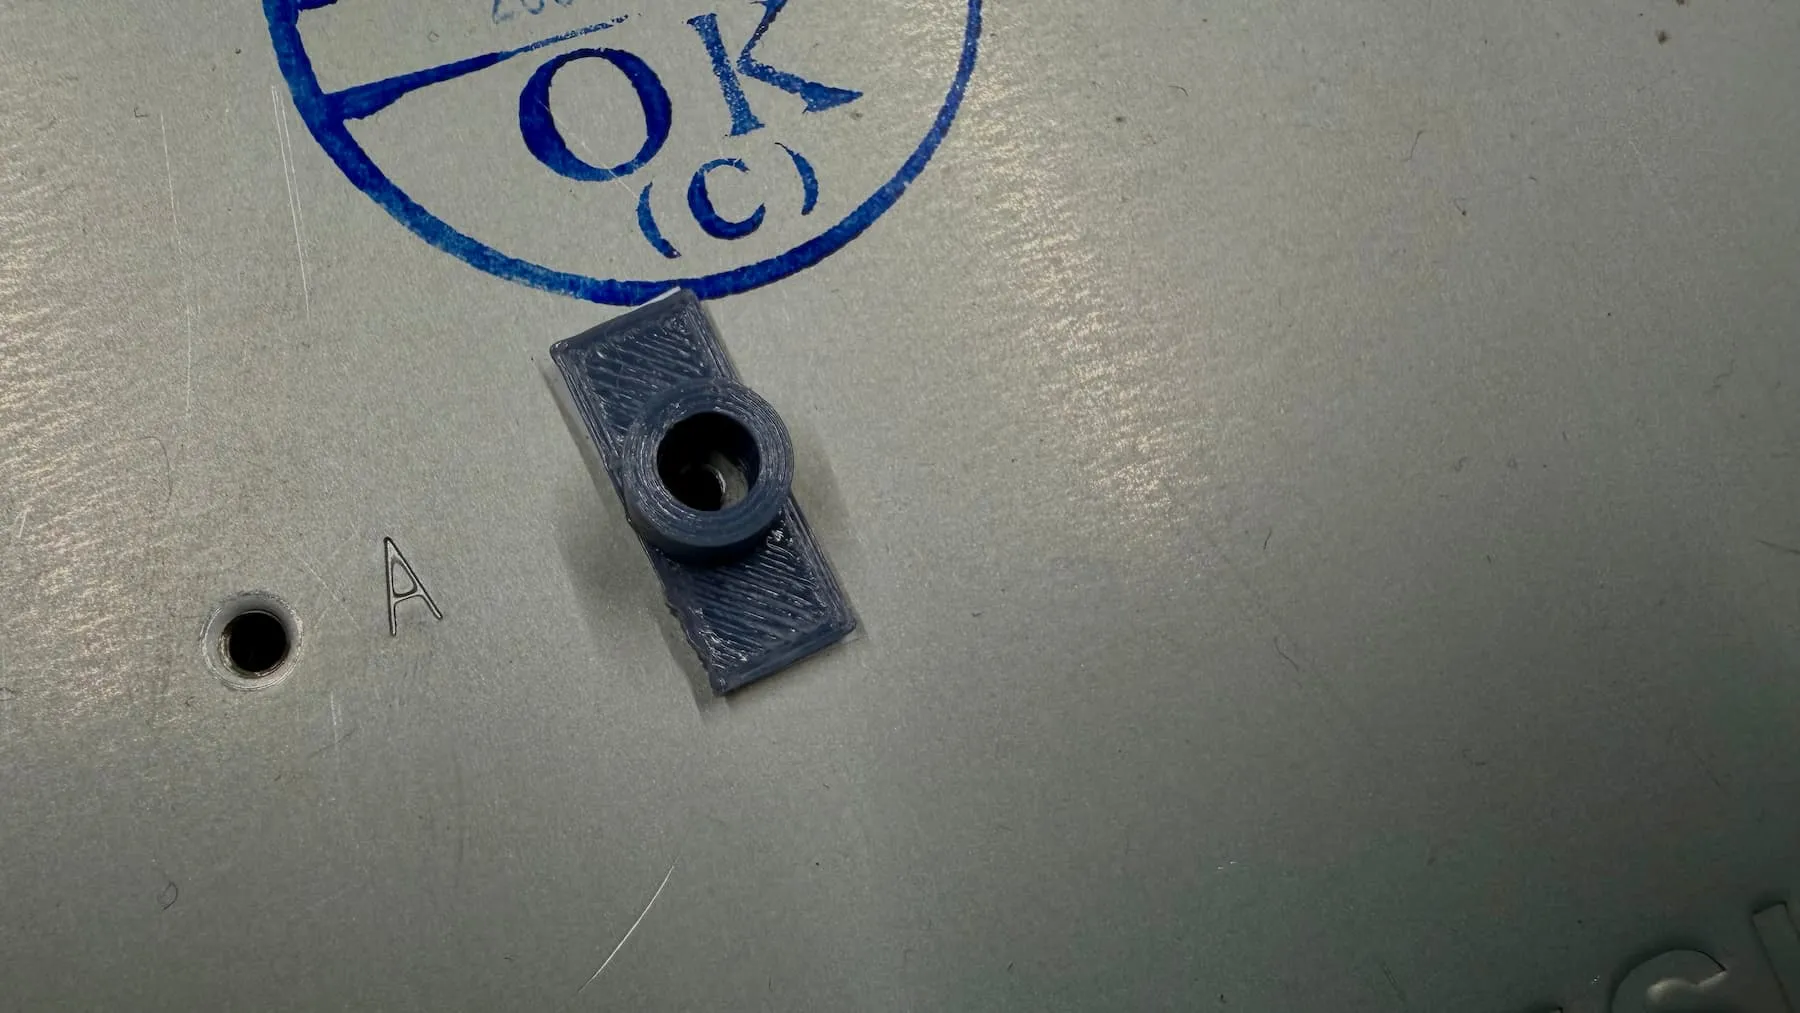
- Chassis Alignment: Because “E-ATX” encompasses a few different dimensional standards, some mounting holes did not align with the Chieftec tray. I resolved this using a 2.5 mm drill bit, an M3 tap, 3D-printed standoffs, double-sided tape, and washers to ensure a secure fit.
7. Power Profiling and the Basement Migration
Because the server is noisy, it couldn’t remain permanent in my living space. The logical solution was to relocate it to the basement of my multi-tenant building. The location had a stable AC power socket but lacked Ethernet connectivity. Fortunately, my flat and the basement share the same electrical phase, making Powerline communication a viable option. I purchased a TP-Link TL-WPA8631P kit (~300 PLN). However, getting it to support VLANs required significant modification, which I will cover in a future article.
Before the final deployment, I recorded the power consumption of the Proxmox host:
- Standby (with IPMI/BMC): ~10 W
- Idle: ~55 W
- Load: (
stress-ng --vm 40): ~158 W - Load: (
stress-ng --cpu 40): ~179 W
8. Final Bill of Materials (Approximate)
| Component | Description | Cost (PLN) |
|---|---|---|
| CPU | Intel Xeon Gold 6148 (20C/40T) | 36 |
| RAM | 2× Samsung 64 GB LRDIMM ECC | 600 |
| Motherboard | Supermicro X11DPI-N | 500 |
| Cooler | U2 Active Air Cooler | 120 |
| Chassis | Chieftec Second-hand | 45 |
| PSU | Reused be quiet! Dark Power Pro 650 W | 0 |
| Misc | NVMe adapter, SATA cable, VGA-HDMI, etc. | ~100–150 |
| Networking | TP-Link TL-WPA8631P Powerline kit | 300 |
Total Core Build Cost: ~1400 PLN + PLC Networking